Create your account at this link using your first.last@go.mnstate.edu email address:
https://refworks.proquest.com/signup/institutionalSignup/
 |
This is the login screen for RefWorks. After you create your account, save those login credentials. You will always see this screen first when using RefWorks, even when exporting citations from databases to RefWorks. *** Your username is your MSUM email
*Check for activation code in junk mail if not in inbox.
|
What is RefWorks?
RefWorks is a citation manager that can help you organize your research by storing citations for the articles you find. You can then use those citations to automatically generate your bibliography, formatted to whatever citation style you choose.
You can even sync your RefWorks account with Microsoft Word to drop in-text citations into your document. You can even include it as an add-in with your web browser to create citations from websites. RefWorks can be easy to use and very helpful, but takes a little bit of practice to be familiar with.
Four reasons to use RefWorks include the ability to:
RefWorks is a reference management service for publishing and managing citations, bibliographies, and references. A user guide is available here: https://libguides.mnstate.edu/refworks
Adding References
 |
There are several ways to add references into Refworks. Begin in the Main Navigation and click on +Add: Upload a Document – these are documents from your own computer files. Example: PDF, PPT, Word Doc. They can also be uploaded with drag and drop anywhere on the All Documents page or Import a Reference page. Import a Reference – allows you to import reference files from other reference managers, from legacy RefWorks and from other sources. |
Create New Reference – Search for a title or DOI, review the results and save the ones you choose, or manually add all reference meta data. When selecting Create new reference a new pane will appear on the right.
You can search for a reference or create it yourself.
 in the Title field to have RefWorks match the title with an item in the library. This button is also available after you enter a value in the DOI field, which appears for most reference types.
 You can save references or articles, including full text (if available) from any website into RefWorks using the Save.
You can also add references by searching in linked library catalogs and publicly available databases. Search results can be imported into your account with the click of a button.
When you are doing your searching in any of the library's databases there will be an option to export the citation to RefWorks. A couple of examples would be:


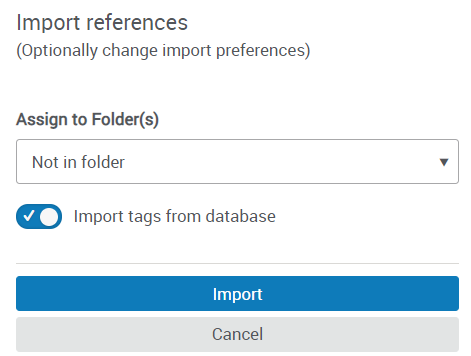
A successful import will generate a message similar to the following:

To export references, navigate to the page or folder of the references you would like to export. Click on Share in the Main Navigation, then Export references. Select the relevant options and click on Export.
RefWorks is a web-based research management tool designed to help you gather, organize, store, annotate, and share all types of resources used in your research, assignments, or dissertation.
RefWorks is MSUM Library's preferred research management tool since comprehensive support is provided. It is also FREE for all NCU students, faculty, staff, and alumni.
With RefWorks, you can do the following:
NOTE: When using RefWorks, you must always check your content and citations for accuracy and proper formatting.
With RefWorks, you are creating your own personal database of resources, and how you organize those resources is up to you.
There are three (3) ways to organize and manage your content in RefWorks:
Managing Projects
You can create projects in RefWorks. Projects allow you to maintain separate reference and resource collections for different research assignments.
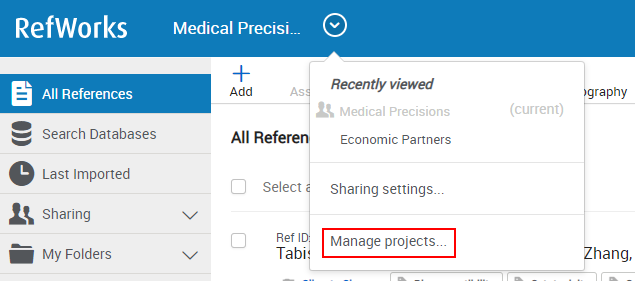
The My projects page appears:
Create a New Project
To create a new project, select Create a New Project. The following appears:

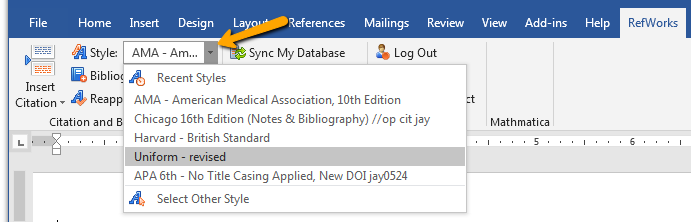
Setting your Citation Style to APA 7th
As a RefWorks user, you can set your profile to reflect resources and create bibliographies using the APA 7th - Sentence Casing, DOI: https://doi.org/
NOTE: There are citation style variations of APA 7th available to choose from in RefWorks so please select and apply the following version: APA 7th - Sentence Casing, DOI: https://doi.org/
To set and update your citation style, select the All References tab on the left menu, and change the View display on your RefWorks dashboard to Citation View. Click on the settings gear  . Search for and select the APA 7th - Sentence Casing, DOI: https://doi.org/ and click Save.

You may also set your citation style under Create Bibliography to create a list of references in the APA 7th - Sentence Casing, DOI: https://doi.org/ style.

If you are using the Write-N-Cite plugin or RefWorks Citation Manager (RCM) for Microsoft Word, you can also select your citation style output:


You can easily create a Reference page (called Bibliography in RefWorks) from the All Documents area, any collection or your search results list.
Navigate to the collection you want to use (or All Documents area or run a search and select items) and click the Create bibliography icon  .
.
You can choose to create a bibliography for selected references or for all of the reference in the collection (or in All Documents if that's the view you are in).

Write-n-Cite is an add-on for Microsoft Word that enables you to run a simplified version of RefWorks inside of Word. Write-n-Cite enables you to access and cite your references while working in Word, even if you are currently offline.
To find the right add-on for your operating system and writing tool, see Finding the Right Writing Tool Add-on.
Features:
When installing Java, you must not install the Ask.com browser toolbar. If you have installed the toolbar, you must remove it.
In RefWorks, select Tools > Tools. The Tools page displays.
IT versions are for use by administrators only and not by end-users.
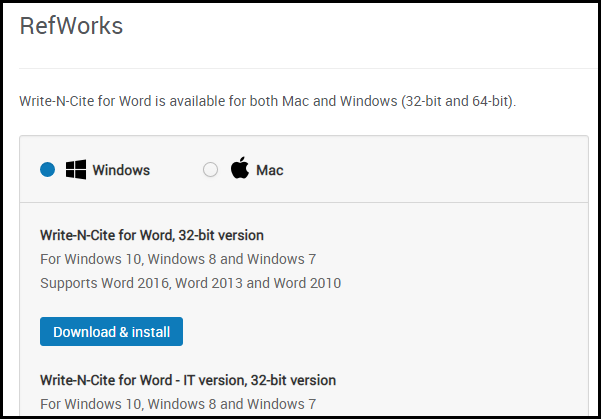
Write-n-Cite for Word Download Page
The available options depend on your operating system.
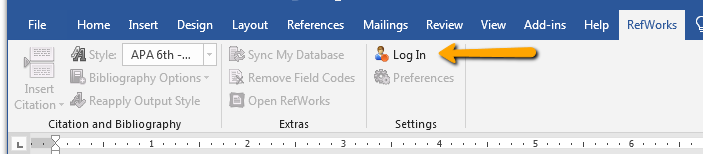
RefWorks Ribbon
If you are using Write-n-Cite on a public computer, log out of Write-n-Cite when you complete your work. However, note that Write-n-Cite provides read-only access to your RefWorks account and does not allow you, or any other user, to make changes to your references.
If you experience any problems, see Contact RefWorks Support.
When you open Microsoft Word, if you did not log out after your last session, you are still logged in. If not, select Log In from the RefWorks ribbon to log in to RefWorks. If someone else was logged into this instance of Word, select Switch Accounts to log out and log back into your account.
If you intend to continue using Write-n-Cite to manage citations in this document, we strongly recommend that you save a copy of your document before converting to plain text, as it cannot be undone.
To add or edit an inline citation:
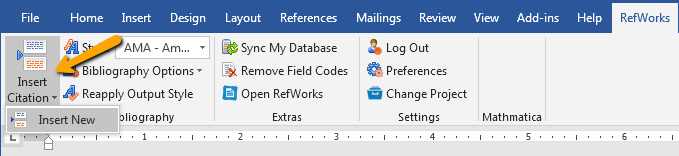
Insert/Edit Citation
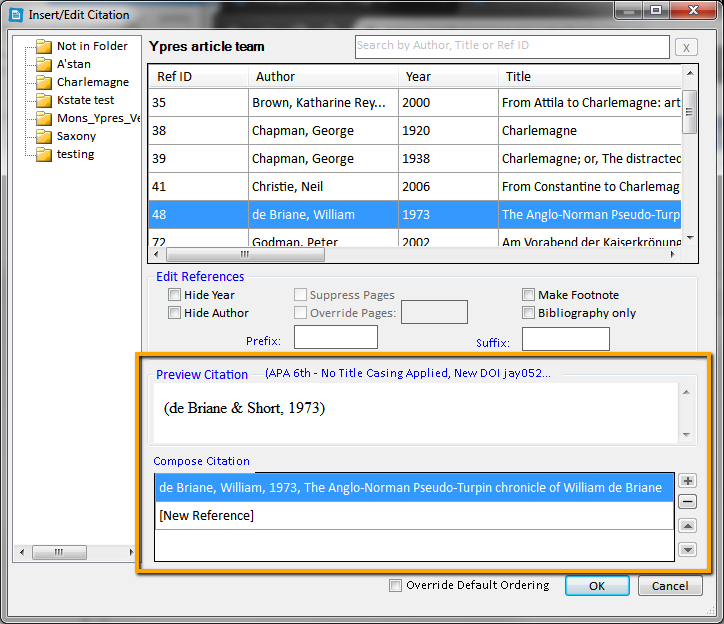
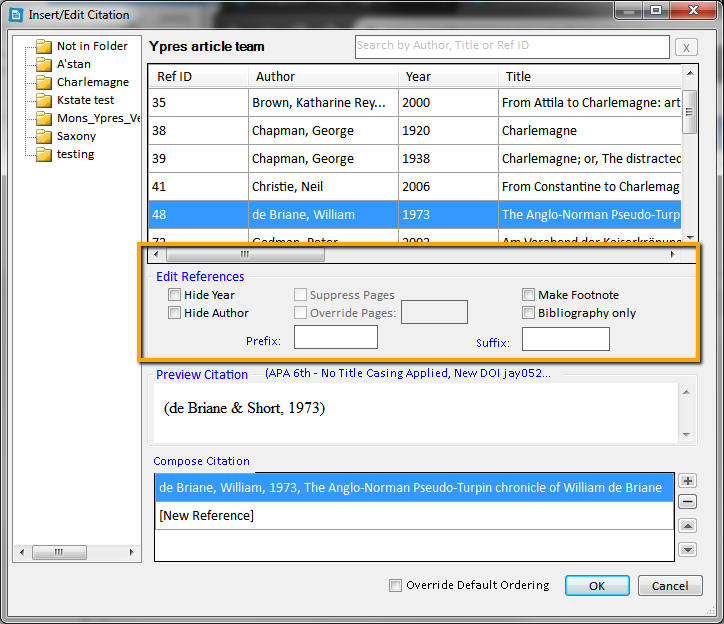
Some options depend on the citation style. For example, adding or hiding page numbers works only for styles with page numbers.
To insert a bibliography:
To insert a bibliography that includes all Write-n-Cite managed entities in your document, select Bibliography Options > Insert Bibliography.
You can create citations in RefWorks to copy to your document, or more conveniently, you can add them while working in your document using a RefWorks add-on. In addition, the add-ons enable you to manage the citations in the: delete, add, restyle, and so forth.
Save to RefWorks is a browser bookmarklet that enables you to add references to your RefWorks account directly from your browser.
See the sections on this page for information about the bookmarklet and about the add-on relevant for your environment.
Save to RefWorks is a bookmarklet that you can install in your browser's favorites (bookmarks) bar. When you are browsing a website that has references that you would like to add to your RefWorks account, select the bookmarklet. RefWorks attempts to save the references and full texts.
Save to RefWorks should work on any modern browser.
To install Save to RefWorks:
If you experience any problems, see Contact RefWorks Support.
To add a reference or a list of references from a website to RefWorks:
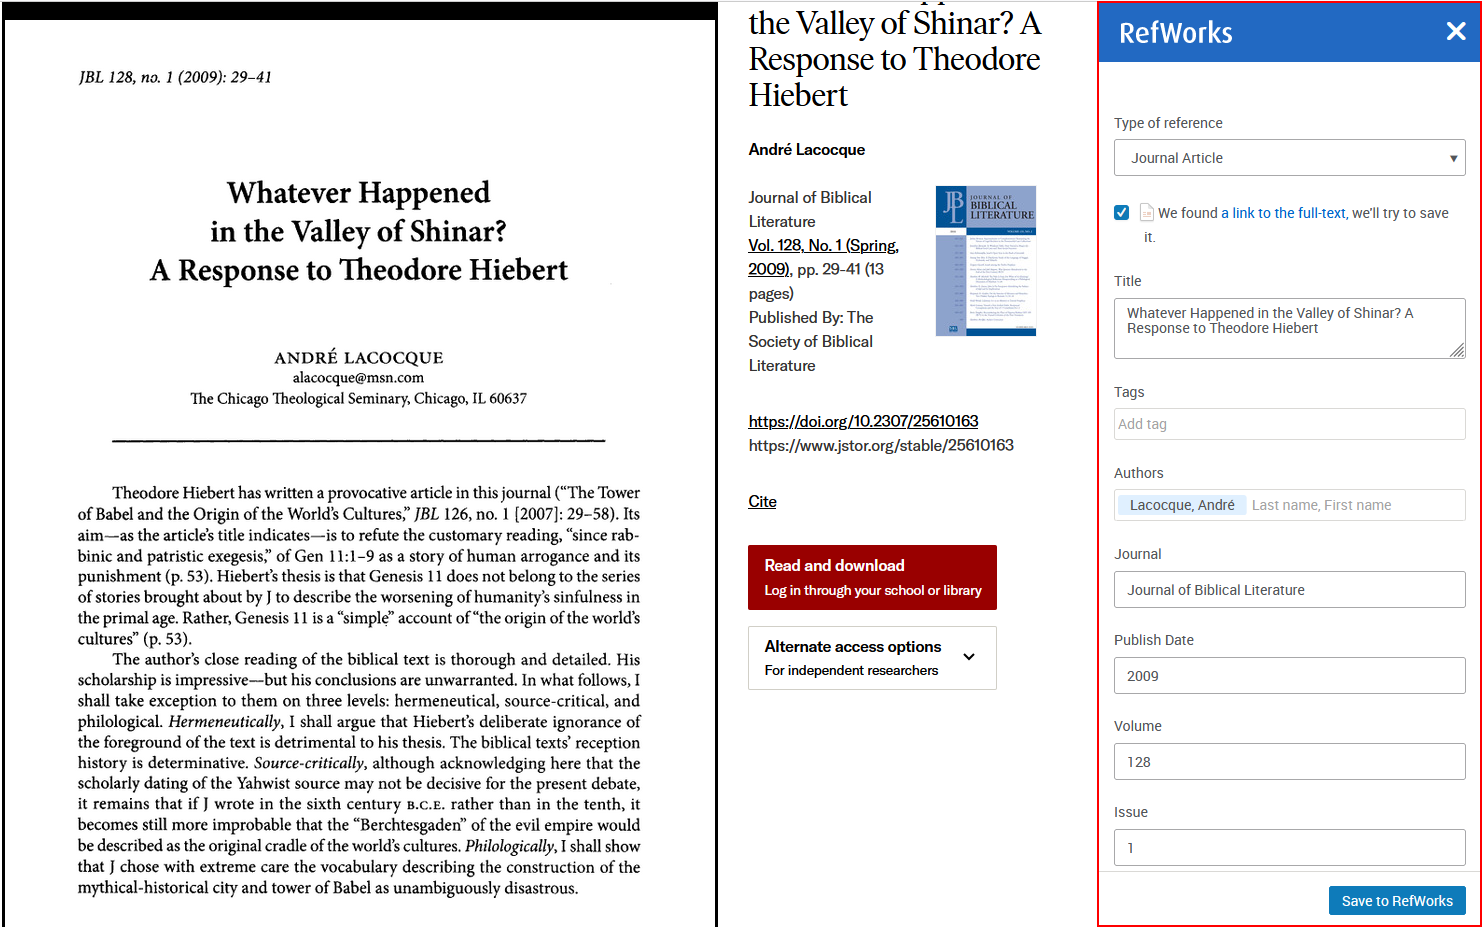
Save to RefWorks Right Sidebar